I'll be adding new creations soon! But in the meantime enjoy the creations below...
Tuesday, April 19, 2011
past hollidaisy creations
Although hollidaisycreates.blogspot.com is new, hollidaisy has been creating for a long time. I've also been blogging about my creations in other areas, so in an effort to get this blog rolling I've collected some previous blog posts of my past creations.
Birdie Jammies
I made my daughter some pajamas for Christmas and I am so happy with how they turned out! I had this adorable flannel with birds on it (I got it in the remnant box at Hancock for cheap) and made pants with it. I didn't have enough for the shirt, so I came up with this option. I had fleece on hand and just used little scraps to make a little bird using the pants as a pattern.
 I couldn't be happier with this sweet little birdie! I used iron on paper stuff to create the bird and it wasn't ideal with my fleece, but it looks good enough for an 18 month old!
 Isn't that bird fabric the cutest stuff ever?!? I love it! I wish I'd bought more... I didn't have a pattern to follow so I used a pair of pajamas that she wears now as a guide. It was really easy and took about 2 hours total time. I think I'll be making more jammies in the future.
Bright Log Cabin Crib Size Quilt
Remember how I made this pillow for my daughter using the log cabin quilt pattern? Well I decided to go crazy and make a crib size quilt for my sweet baby boy. I chose my fabric... I love all the bright happy colors!

Then I pieced my top together in a fun, bright non-traditional log cabin pattern... adding long strips to the ends to get it to the size I wanted. Then finally I quilted it. I attempted doing it by hand, but quickly gave up and did it on my machine. I love how it turned out.
 Its interesting though, it looks completely different to me in the pictures than in real life. I see all the little pieces looking at it in person, rather than the big picture/pattern. I'm happy to say that I like it both ways. Do you think baby boy will like it?
Funny side story... I used a sating edge because my daughter loves her satin edging on her blanket so much I hoped it would make baby boy love this one. Well, when I laid the quilt out to take pictures, my daughter just went around the entire edge softly petting the satin. It was so sweet!


Multi-Season Wreath

My Christmas wreath made me so happy, every time I walked in the door I smiled. I wanted to do something for Valentine's Day too. Trouble was, we got snowed/iced in for a week and I couldn't get to the store to buy supplies for a new wreath. Soooo... what is a girl to do? Reduce, reuse, and recycle of course! Everything that I used here was something I had on hand and you probably do too!
I know Valentine's Day is past, but I made this wreath and took all these pictures and figured I'd post them anyway. And the best part about this wreath (to me, anyway) is that it can be used formore than one holiday. I don't know about you, but I don't have room to store a different wreath for every season/holiday. This one is whimsical and happy, very cutesy, but that's what Valentine's Day is all about, right? What you'll need if you want to do it my way:
- A pair of old pantyhose
- A bunch of plastic bags from the grocery store
- A piece of cardboard, as big as you want your wreath to be
- Yarn
- Felt
- Glue gun and glue sticks
- Bobby pins
- Ribbon, for hanging (if desired)
This is a great project for anyone! So simple and fast! Since I was just shooting from the hip, there are things I would have done differently. I'll add those in italic.
Step 1: Stuff your pantyhose with wadded up plastic bags. I ended up using both legs of my pantyhose so that the size was more uniform. I tried to stuff them in tight enough that it was solid, but not so tight that I couldn't move it a bit. Just keep stuffing them in until you get it the size you want. Tie off the ends. I think it would have been more uniform if I had used both legs to the same length, rather than one longer than the other.
 Step 2: Cut a circle out of your cardboard about 1 1/2" wide the diameter of your desired wreath. I used a sturdy pair of kitchen shears, but whatever you feel comfortable with will be great. I even had a cut in my circle to get to the inner circle. Once its all wrapped up, it doesn't matter at all. I would have definitely used a guide for this, I just used my stuffed pantyhose as my guide, but a big bowl would have been better!
 Step 3: Hot glue your stuffed pantyhose to the cardboard.
 Step 4: Start wrapping your yarn around your wreath form. It might take a while. I did it in about 6-8 inch increments, not filling it all in the first time around. As I went around the entire wreath, I would go over the other areas surrounding it. Wrap and wrap and wrap. I found it to be helpful to make a ball of yarn, hold the wreath upright between my legs and pass the ball of yarn over and around the wreath over and over, then rotate to the next section. I kept going, overlapping in a fun layered way until I ended up with:
 Step 5: Make your embellishments. I just cut out some hearts and letters with my felt. I layered two shapes together with hot glue. I attached the letters with hot glue as well. You could sew these to make them uber cute, but hot glue was fast and easy!
 Step 6: Now this is the part I'm really proud of. I was just going to glue the hearts to the wreath, but again thought about the hassle of having too many wreaths and this is what I came up with.... put the embellishments on bobby pins with a small dab of hot glue! That way they can be removed and I make others for spring and Easter! Perfect! I'm not sure if it would be better, but placing the bobby pin further up on the embellishment might make it better. I think doing some of your embellishments this way, at least, would be nice. I do like having some of them stand up into the center of the wreath.
 Step 7: Arrange your embellishments on your wreath. What's that you don't like the way it looks? Go ahead and try again! Its so forgiving, you can just keep moving, adding, subtracting, etc. until you get it right! Tie a ribbon and hang it on your door! So fun!
 This doesn't have to be a RRR project either, you could definitely just head to the craft store for a foam wreath form and just wrap it up in yarn. I'm excited to decorate it in flowers for spring (yep, its spring already in Texas 80 degrees! Wahoo!)!
My first wreath
I love wreaths. I would love to have them on my door, over my fireplace, over my bed, over my TV... you get the idea. Trouble is I've always felt they are expensive or a lot of work to make. Well, this past December I decided it was time I gave it a try and embellished one. I love how it turned out! It was a nap time well spent. Every time I drive up to my house I smile.
 What's a craft you've been wanting to try, but haven't braved yet?
Beginner Quilting
 My ward Relief Society decided to have a beginner quilting class. We didn't actually do any quilting, but we learned how to piece. Our teacher taught us the log cabin pattern, which looks a lot more intimidating that it is.
 I only had tiny scraps of fabric to work with, so I decided to just make a one square pillow with a wider border. My border doesn't actually fit the pattern because I didn't have a large enough piece of one color, but it works for me. I made it for my baby girl with her favorite minky dots on the back. She LOVES it! And it makes me so happy that I made something so cute!
Leave me a comment if you'd like instructions on how to make your own log cabin quilt squares... I don't want to take the time for a tutorial if no one's interested...
Ruffled Apron Tutorial
For Christmas we draw names with all the cousins on my hubby's side of the family, I was lucky enough to draw the names of all the 2-3 year old girl cousins this last year. I decided to make them each some felt food and an apron. They turned out great! I was so excited! After I made my first apron I decided that I'd do a tutorial since I got a lot of my information from several different sources to make this one pattern.
Some disclaimers:
1) I made 4 different aprons, each one a little different from the next. Some of the steps are done with fabric from one apron, other steps are with fabric from another, I hope its not too confusing.
2) My sewing machine was on the fritz, really making it difficult to make straight seams. I'm putting these pictures up anyway. Don't judge me, the 2 year old girls didn't care!
3) I'm not a professional anything... seamstress, pattern designer, photographer. The lighting at my sewing table is less than ideal, especially for photography. I hope you can get the information you need still. This was my first attempt (and a rushed one at that) with this design, so there are flaws that you and I could definitely improve upon. Like I said, I just thought it would be nice to have a one stop spot for this design rather than having to hunt all over the web for the snippets I used from others.
OK, now that you know where I'm coming from, let's get to where we're going! Onto the tutorial...
Supplies: You can make this general design any way you want. For a child or an adult, a girl or a boy each with minor adjustments. This tutorial will be for a little girl approximately size 3T. I used measurements based on the tutorial found at Skip to my Lou. You can download the template for the bottom of this apron at the link. You will need:
- Two pieces cut from the above template. One for the front, one for the back. I used a contrasting solid to line my apron.
- Two pieces cut for the top, front and back. I made a pattern piece by folding a sheet of 8.5 x 11 paper in half lengthwise and drawing a rectangle with one rounded corner (with the fold being one side of the rectangle). I wanted it to be about 1 1/2-2 inches smaller across than the bottom piece.
- One strip of contrasting fabric cut 4 inches by 45 inches for the ruffle.
- One strip of same contrasting fabric cut 5 inches by 25 inches for waistband (from skip to my lou: Take waist measurement and add about 5 inches to determine length of fabric needed).
- Two strips of solid contrasting fabric cut 4 inches by 20 inches for neck ties (ribbon would also work well... and be easier).
- One contrasting fabric cut to size of pocket you want (not pictured).

The strips: The first thing you want to do is work with the strips for the ruffle, waistband, and neck straps. Each strip you want to fold in half lengthwise and press. Fold ruffle piece right sides together. Fold the others wrong sides together.
For the ruffle, you want to sew the short sides (I used my serger, use 1/4" seams if using sewing machine).
 Turn the ruffle, right side out and press the corners nice and tidy. You'll have a really long skinny rectangle. One side will be the fold, the short sides will be your seams, and the other long side will be open at this point. Set aside for now.
 For the waist band and the neck ties you've pressed them lengthwise, remember? Now open it up so you can see the line down the middle.
 Next, fold each long side to that middle line and press flat. Fold short edges right sides together (like ruffle piece) and sew.
 Turn those seams to the inside and fold in half along the pressed middle line again and press. So you'll have the two folded edges together.
 For the neck straps topstitch along each side.
 Placing neck straps: Take your main fabric top piece and lay the neck straps down where you want them to be. I placed mine right where the fabric came our of the curve, so they were attached at the straight edge of the top.
You want to put the straps going down, with about an inch above the top of the main fabric.
 Then pin the lining fabric over the straps with ride sides of each top piece together.
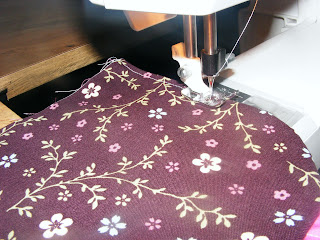
 Sew along the sides and top (but not the bottom) of the top pieces.
 Turn right side out (see how the straps come out at the top?). Press. Top stitch.
 The last thing I did was serge the bottom edge of the two top pieces together. This is one of the steps that could use some improvement, but when I make another one, I'll try to take pictures of what I'd do... I think it would just be confusing trying to describe what my plan is..
 Then pin the lining fabric over the straps with ride sides of each top piece together.
 Sew along the sides and top (but not the bottom) of the top pieces.
 Turn right side out (see how the straps come out at the top?). Press. Top stitch.
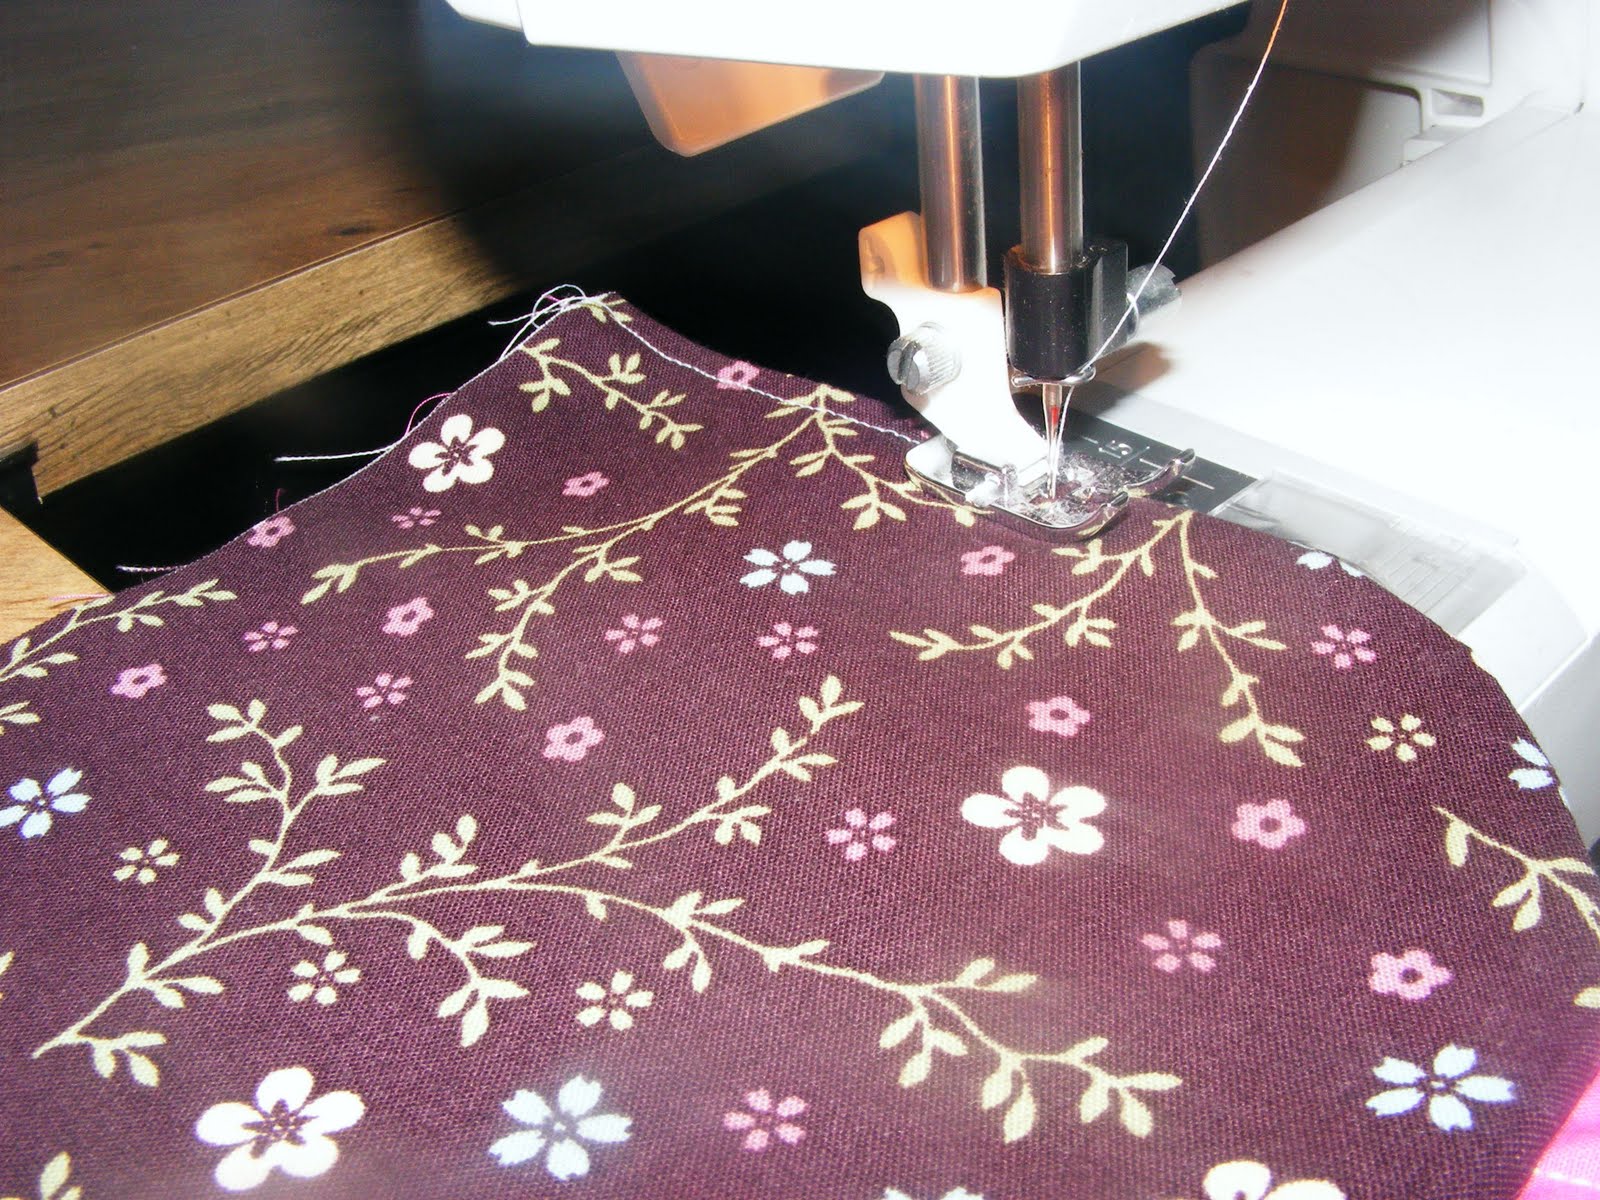 The last thing I did was serge the bottom edge of the two top pieces together. This is one of the steps that could use some improvement, but when I make another one, I'll try to take pictures of what I'd do... I think it would just be confusing trying to describe what my plan is..
Voila, the top piece is finished!
 The pocket: If you have a serger, finish each edge of your pocket.
 Press the finished edge under on all four sides. If you don't have a serger, press each edge under 1/4", then 1/4" again so the raw edge isn't visible.
 Sew and 1/8" seam along the top of the pocket.
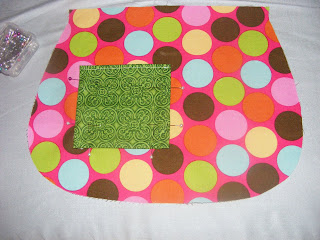
 Pin pocket in place on main fabric bottom piece.
 Sew along the sides and bottom of the pocket with 1/8" topstitch.
 And pocket is done!
 Back to the ruffle: Remember that long, skinny strip that we made in the first step? OK, we're ready to move on with that one...
 The pocket: If you have a serger, finish each edge of your pocket.
 Press the finished edge under on all four sides. If you don't have a serger, press each edge under 1/4", then 1/4" again so the raw edge isn't visible.
 Sew and 1/8" seam along the top of the pocket.
 Pin pocket in place on main fabric bottom piece.
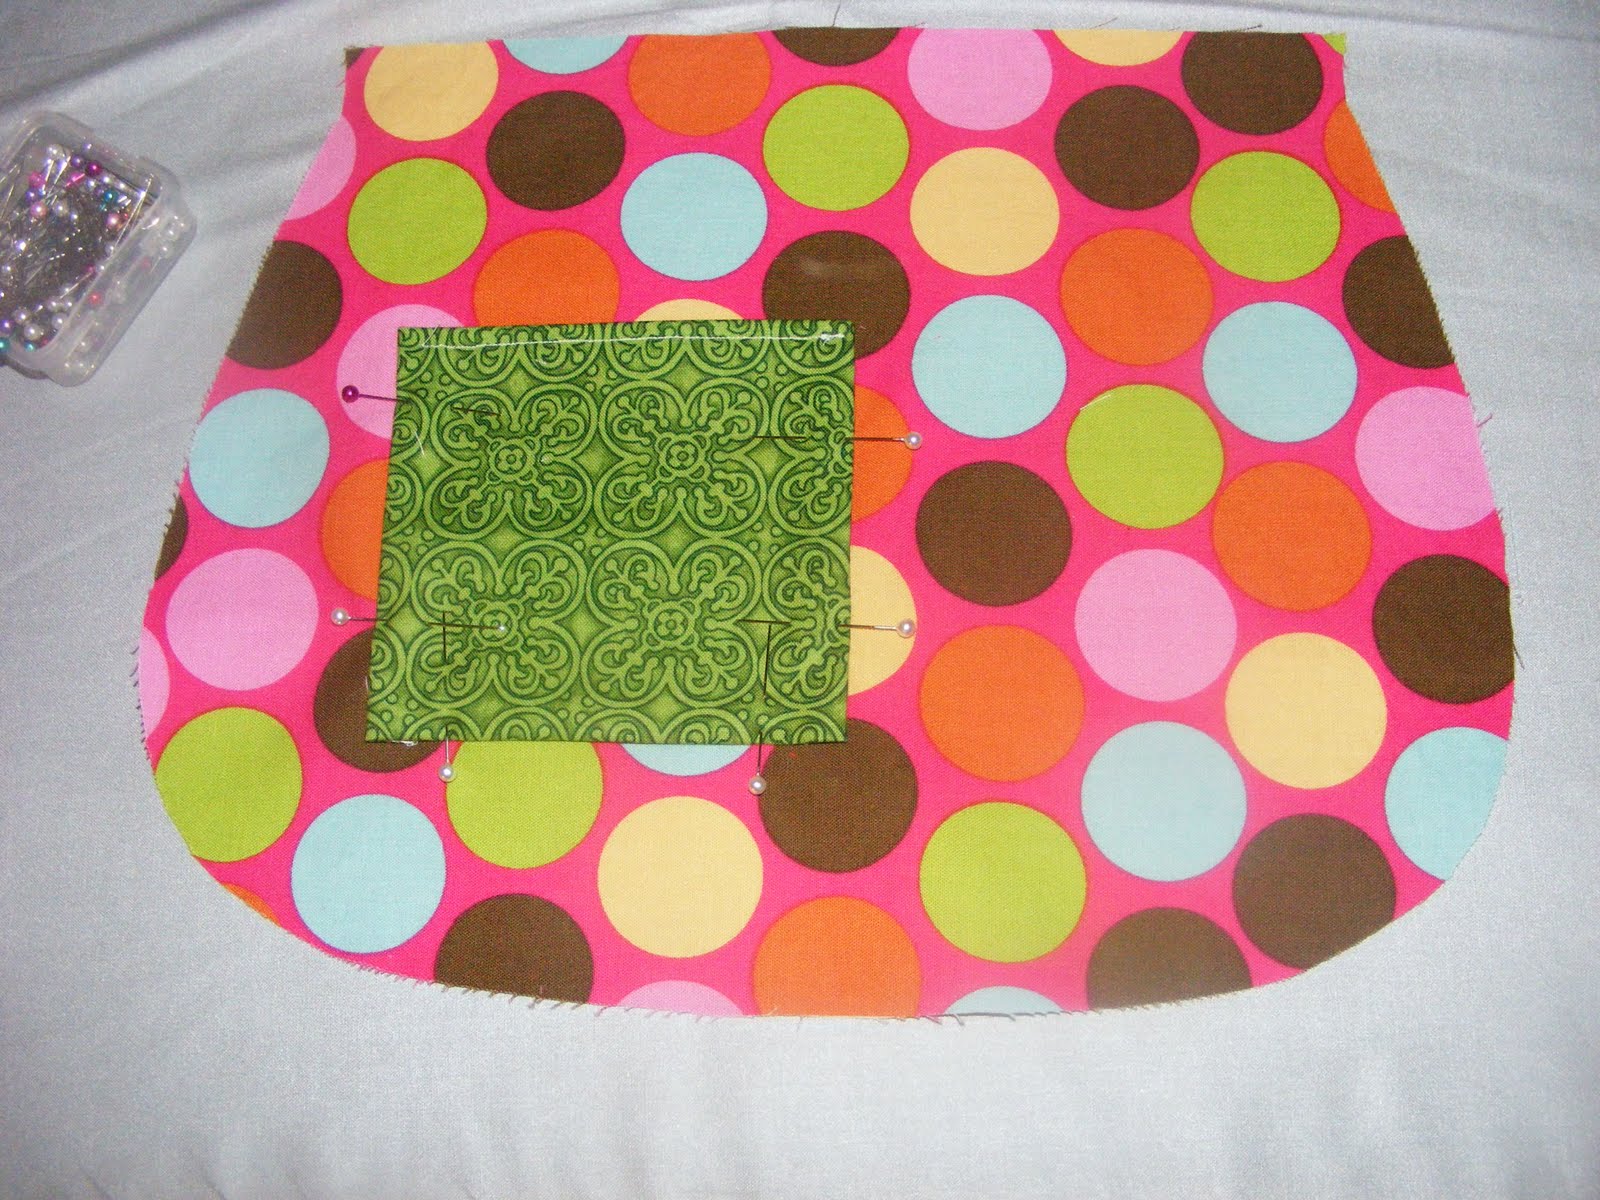 Sew along the sides and bottom of the pocket with 1/8" topstitch.
 And pocket is done!
 Back to the ruffle: Remember that long, skinny strip that we made in the first step? OK, we're ready to move on with that one...
Increase your stitch length to as long as you can (mine is 6.0), sew along the entire length of the raw edge of the ruffle. Most gathering instructions will have you do two seams for gathering, I didn't do it because my machine was being so finicky. It would have been helpful, though. Skip to my Lou has an interesting way of gathering that I'd like to try when my machine works... be sure to check it out.
Fold the piece in half and mark with a pin.
 Pull thread at either end and gather the ruffle until its the length you need to fit around the bottom of the apron.
 Mark the bottom, middle of the bottom apron piece with a pin. Match up the pins marking the middle. Making sure not to twist the ruffle, attach it to the rest of the bottom of the apron. To allow for the ruffle to taper onto the apron, attach it as pictured below (or as described on Skip to my Lou).
 See how you want to have the raw/gathered edge of the ruffle with the raw edge of the right side of the apron? Lots and lots of pins are very helpful here. :)
 Lay the lining fabric on top of the ruffle and main fabric, right sides together. Pin in place.
 Sew, with 5/8" seam allowance to make sure you get all of the ruffle attached. Again you'll leave the top edge open, so you're only sewing along the sides and bottom.
 Turn right side out, press, and top stitch.
Attaching the Waistband: Take the waistband piece that you prepared earlier and place it over the top edge of the bottom of the apron.
 You'll kind of sandwich the waistband around the apron. So each side of the waistband is the bread and the apron is the meat. One of the short sides of the waistband should be close to the side edge of the apron, the other short side will be long hanging off the apron to wrap around the waist.
 You also want to put the top piece of the apron on at this point. Since its a totally finished piece I just placed it on the back of the waist band as pictured below.
 Top stitch along all four sides of the waist band. I know, the seams here are embarrassing. I'm over it. The last thing you want to do is add a piece of velcro, so it stays on. Sew a piece that is 3 inches to the apron itself. Sew a 2 inch piece of the alternate side of velcro to the front of the long end of the waist band. This way it will wrap all the way around the waist and your child can attach it themselves! Perfect!
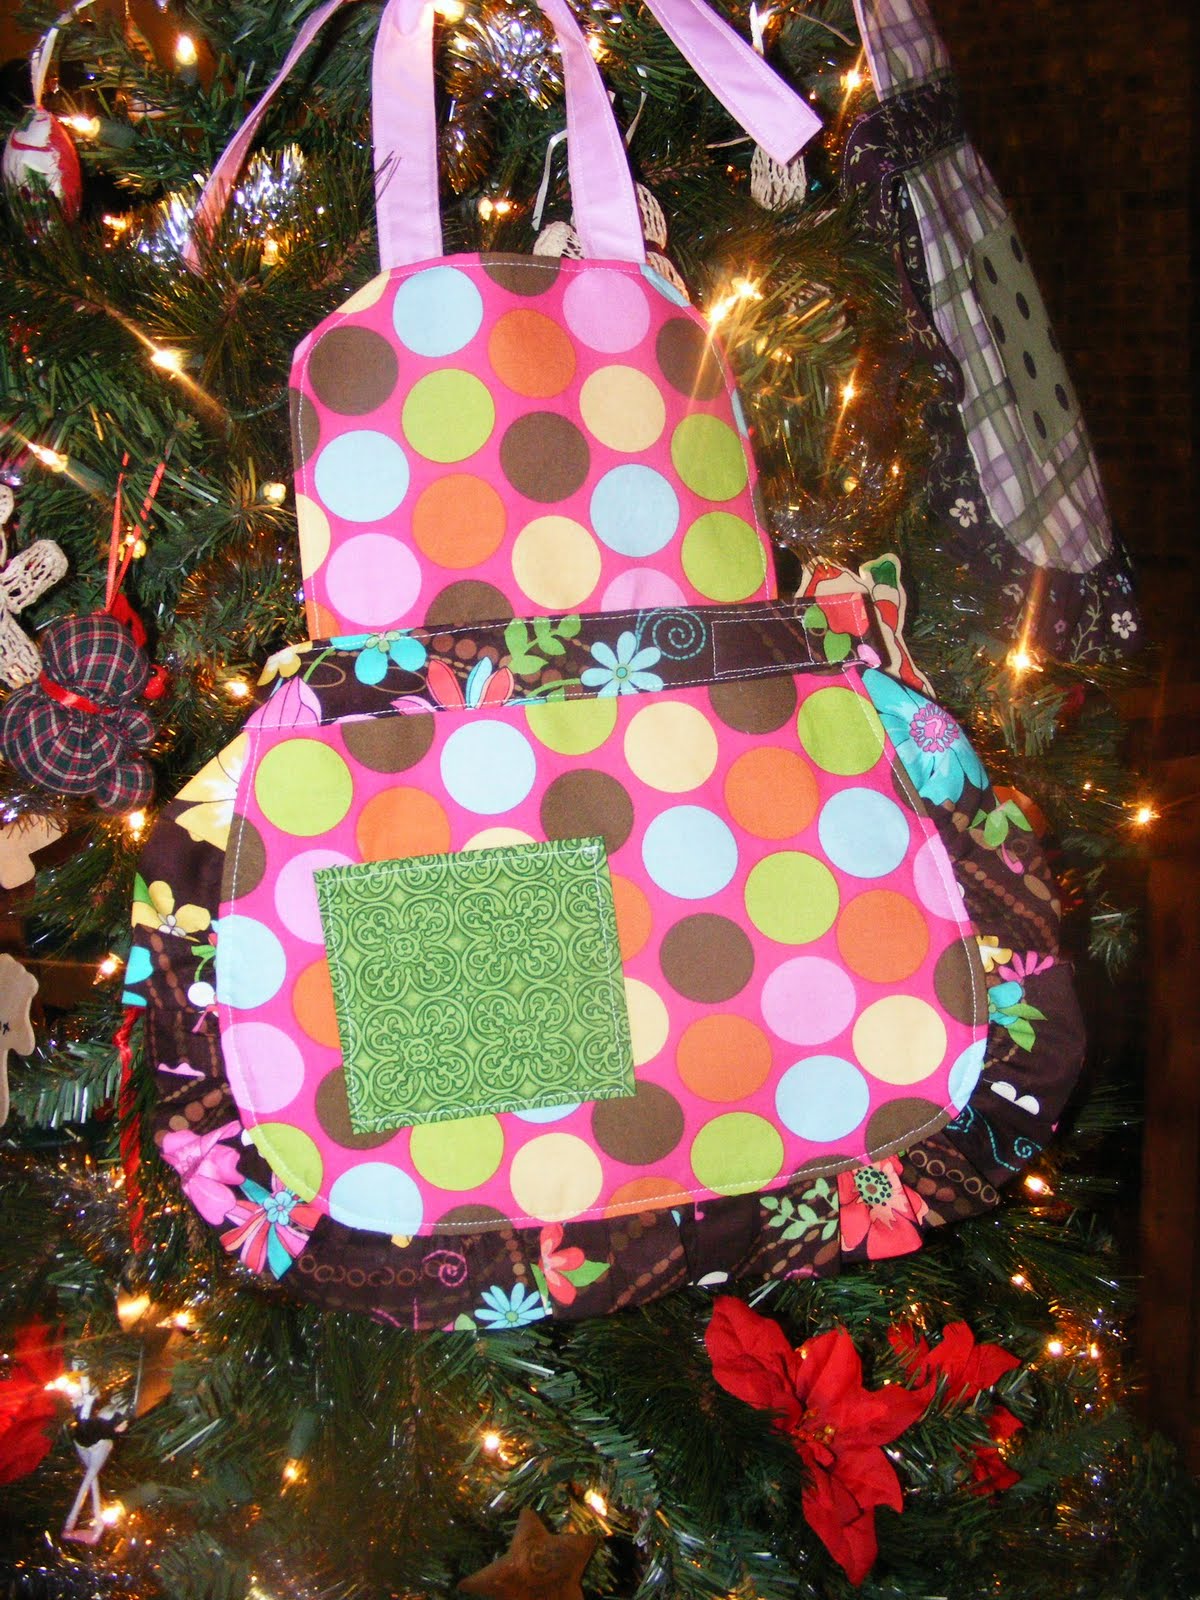
 You ready for the finished product? Here are my four... I think it took longer to write up this blog post than to sew each one.
 See my variations of pocket sizes and sides?


 I'm going to make one for myself next, the steps will be basically the same, but I will make some changes to the attachment of the top... stay tuned. Until then, go ahead and make one for someone you love. My boys are begging me to make one for them now....
Linked up at sew-licious home decor
 You'll kind of sandwich the waistband around the apron. So each side of the waistband is the bread and the apron is the meat. One of the short sides of the waistband should be close to the side edge of the apron, the other short side will be long hanging off the apron to wrap around the waist.
 You also want to put the top piece of the apron on at this point. Since its a totally finished piece I just placed it on the back of the waist band as pictured below.
 Top stitch along all four sides of the waist band. I know, the seams here are embarrassing. I'm over it. The last thing you want to do is add a piece of velcro, so it stays on. Sew a piece that is 3 inches to the apron itself. Sew a 2 inch piece of the alternate side of velcro to the front of the long end of the waist band. This way it will wrap all the way around the waist and your child can attach it themselves! Perfect!
 You ready for the finished product? Here are my four... I think it took longer to write up this blog post than to sew each one.
 See my variations of pocket sizes and sides?

 I'm going to make one for myself next, the steps will be basically the same, but I will make some changes to the attachment of the top... stay tuned. Until then, go ahead and make one for someone you love. My boys are begging me to make one for them now....
Wednesday, April 13, 2011
So exciting!
I am so excited to finally have a blog dedicated entirely to my creative therapy! I've had a multipurpose blog for quite some time and I've never loved it, but no more! I plan on completely loving this blog! I hope you will too!
Subscribe to:
Posts (Atom)