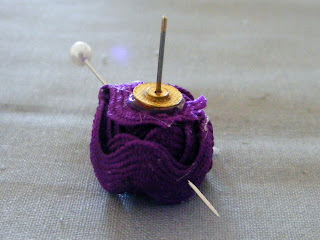
I've been wanting to try making these adorable little rosettes for awhile, and finally did it today! I can't remember where I saw this idea, but I'm sure its all over the blogosphere. Here is my take on making ric-rac rosettes and using them for earrings.
What you will need:
- About 20 minutes
- Some ric-rac (I think I had about 20 inches, so 10 inches per rosette)
- Quick drying fabric glue
- Earings (I am using an old pair of earrings that I haven't worn since high school!)
- E6000 glue (pictured further down the post)
The best part of this for me... I had it all on hand so this project was FREE!!!
Start out by putting some of the fabric glue across about 2 inches of the ric-rac.
Then start rolling. Continue putting glue on the ric-rac and rolling...
When you get the rosette to the size you want, put some glue across the bottom of the rosette, then fold the ric-rac straight down and across the bottom. You can see its folded/pinched a little under my finger, I put a small dab of glue there too, to hold it in place.
Snip the ric-rac so its covering the bottom of the rosette, but not hanging out, you don't want to see it from the top side. Then stick a pin through the whole thing to hold in place while the glue continues to dry.
No put a small dab of E6000 on your earring and smush it into the bottom of the rosette.
Let dry. Remove the pin.
And enjoy your fun, new, fashionable earrings!
Linking up to....


Love the earrings. Way to go Kim. You look beautiful. Thanks for sharing. Mom
ReplyDeleteoooo! love them!!! way cute and i've never seen these before. you're inspiring!!
ReplyDelete